The compressor is probably the most-used processor in the studio — and the most often misused. Not because it is complicated, but because we turn its knobs without always knowing what they do. Threshold, ratio, attack, release, makeup: here is what each control actually changes, plus a simple method to set it on purpose rather than out of habit.
What a compressor really does
A compressor reduces the gap between the loud and quiet parts of a signal: it automatically lowers the level whenever the signal passes a point you set, then lets you bring the whole thing back up. The result is a steadier signal, easier to place in a mix and often perceived as more present. It is not a tool to “turn things up,” but to control dynamics.
The controls, one by one
Threshold
This is the level at which the compressor starts working. As long as the signal stays below the threshold, nothing happens; the moment it goes over, gain reduction kicks in. The lower you set the threshold, the more often and the longer the signal is compressed.
Ratio
Ratio sets how hard the reduction is above the threshold. A 2:1 ratio means that for every 2 dB in above the threshold, 1 dB comes out. At 4:1 you are into firm compression; past 10:1 you are in limiting territory. A gentle ratio (1.5:1 to 2:1) suits a bus; a stronger one (4:1) suits a vocal that moves a lot.
Attack and release
Attack is how long the compressor takes to react once the threshold is crossed. A fast attack catches transients (a snare hit, the pluck of a bass) but can dull them; a slower attack lets them through and compresses only the body of the sound. Release is how long it takes to return to normal once the signal drops back below the threshold. Too short and you get audible pumping; too long and the compressor never lets go, smothering the signal. Many units offer an automatic release that adapts to the programme.
Knee, makeup and detection
The knee describes how compression sets in around the threshold: a hard knee acts abruptly, a soft knee eases the reduction in more gently. Makeup gain compensates for the level lost to compression so you match the input volume. Finally, detection can work on peaks — useful for limiting — or on an average (RMS) value, closer to how we hear and more musical on a vocal or a bus.
A method that works
- Set the goal: tame a vocal that jumps around, tighten a bass, glue a drum kit?
- Pick a suitable ratio (2:1 to settle, 4:1 to hold, more to really tame).
- Lower the threshold until you get the gain reduction you want — 3 to 6 dB is often plenty, readable on the gain-reduction meter.
- Set attack to leave the room you want for transients, then release so it breathes with the track.
- Compensate with makeup, then compare at matched level against the untreated sound: it is the only way to judge without being fooled by volume.
A starting point by source
The figures below are starting points to adjust by ear, not fixed recipes.
- Lead vocal: 3:1 to 4:1 ratio, medium attack (10 to 20 ms) to let consonants through, fast-to-medium release, 3 to 6 dB of reduction. An opto shines here thanks to its gentleness.
- Bass: 4:1 ratio, a slower attack to keep the note’s attack, release locked to tempo; the goal is level consistency from note to note.
- Snare and drums: slow attack to keep the hit, fast release to breathe, firm ratio. A FET brings the bite.
- Mix bus: gentle ratio (1.5:1 to 2:1), only 1 to 2 dB of reduction, slow attack and automatic release — you are after cohesion, not effect.
VCA, FET, opto, vari-mu: a matter of character
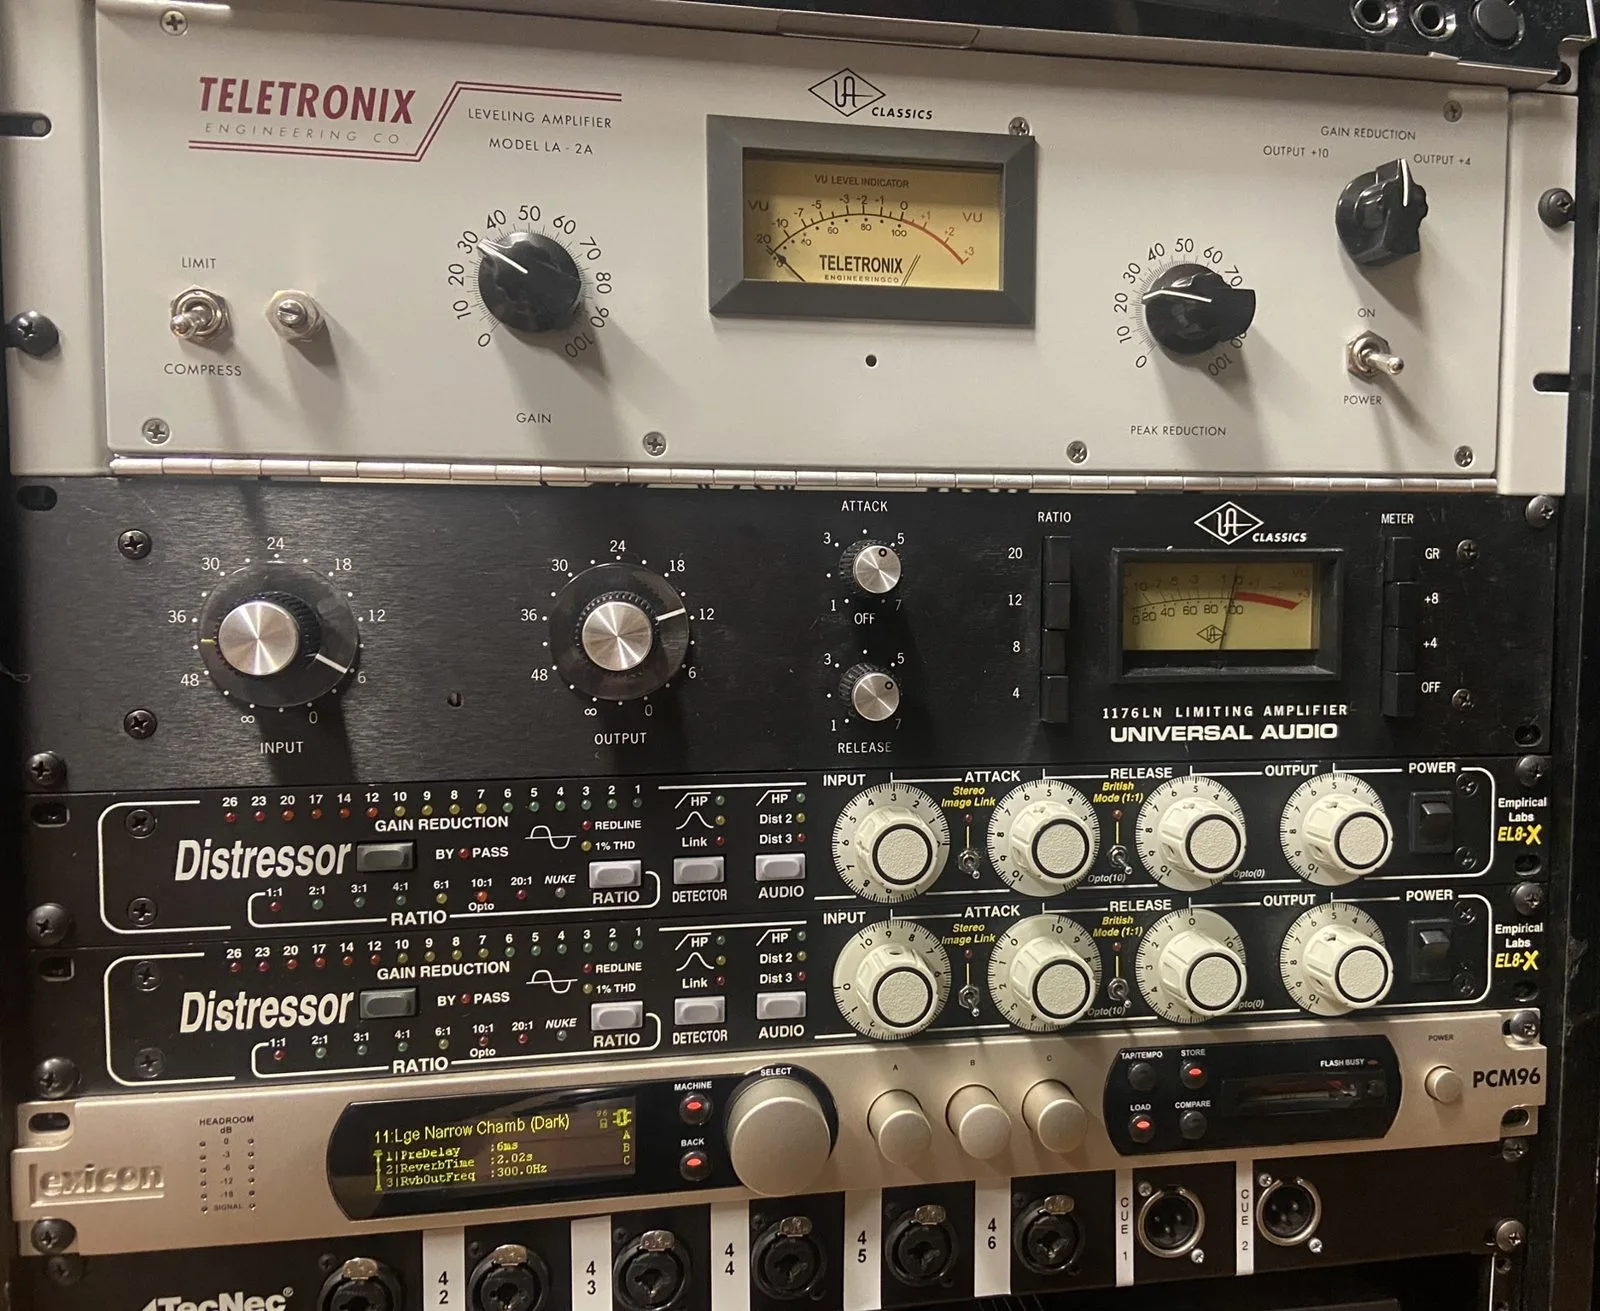
Beyond the settings, the compressor’s circuit colours the result. VCA designs are precise and versatile, ideal on a bus. FET units like the 1176 are fast and aggressive, great on a vocal or drums. Opto units like the LA-2A compress gently, with a programme-dependent release that is very musical on a voice or bass. Tube vari-mu units bring a roundness and “glue” prized on a mix bus. None is best in absolute terms: each has its playground.
The most common traps
Too much gain reduction flattens the life out of a signal without you noticing in the moment. Too fast an attack kills transients and dulls a mix; a badly set release makes it pump. And the classic one: judging compression “by volume” because the treated sound seems louder. Match levels before you decide.
Going further
Once the compressor is tamed, the derived techniques make sense: parallel compression to keep the punch, sidechaining to make a mix breathe, de-essing (a compressor driven by sibilance) to tame a voice, and where the compressor sits in the mastering chain. None of it works, though, without clean gain staging upstream.
My take
The compressor suffers from “default” settings copied from one project to the next. The real breakthrough is setting by ear, at matched level, with a clear goal in mind. Three well-placed decibels of reduction beat ten that flatten everything. And when a signal already sounds good, the best compression is sometimes the one you do not apply — a question worth asking on every track.