
In control room chats as well as on home-studio forums, the term VCA comes up a lot. It’s a technical word you hear all the time, yet it can still feel a bit vague: is it a compressor? a group? just a virtual fader? This article clears things up, starting from the underlying electronics and moving on to practical mixing uses, whether you’re working on an analogue desk, a digital console or in a modern DAW.
Goal: to give you a hands-on understanding of the VCA so you can decide when and how to use it. You’ll see why a VCA fader doesn’t replace a group bus, how it makes automation easier, and how to apply it in a real-world drum-kit example. Specific points for Cubase, Pro Tools and other DAWs round things off, so that terms like Cubase VCA and Pro Tools VCA actually mean something concrete in your workflow.
Definition of a VCA (Voltage Controlled Amplifier)
Electronic principle
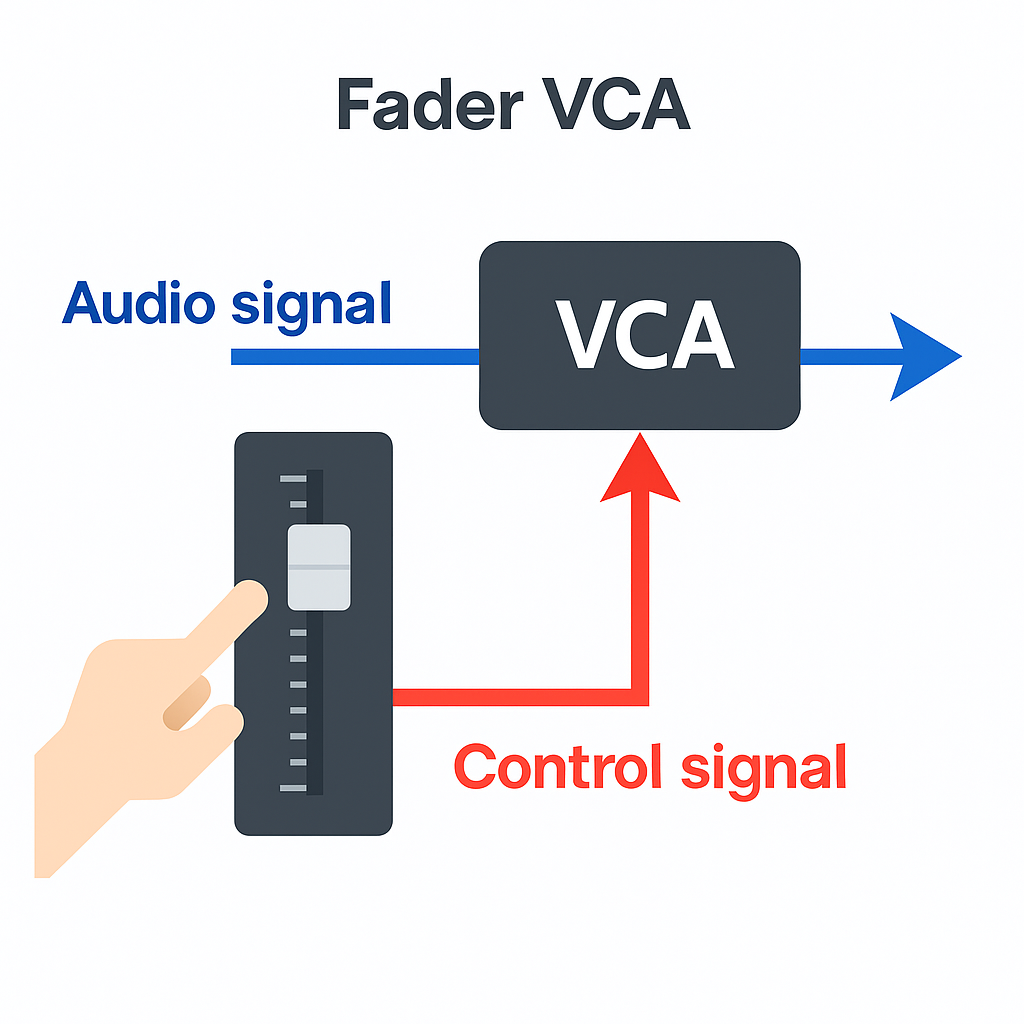
Historically, a VCA is a Voltage Controlled Amplifier, in other words an amplifier whose gain is driven by a control voltage. On an analogue console fitted with VCAs, the audio signal does not physically pass through the VCA group fader: instead, a control voltage tells each channel what level to apply. This gives you a coordinated, precise and noise-free level change. Control is usually applied according to a fader law tailored to human hearing (a logarithmic curve), which keeps the perceived progression feeling natural over the full travel of the faders.
Global volume control via voltage
An audio VCA lets you control the level of multiple individual channels at the same time. In practice, moving a VCA fader is equivalent to moving all the affected channel faders by the same proportion, without rerouting their audio to a common bus. This structural nuance has important practical consequences: the channels’ post‑fader sends follow along (because you’re effectively acting as if you were touching the track faders), pre‑fader sends remain unchanged, and you avoid adding an extra summing point that would alter the signal path and its shared processing. The VCA acts as a controller, not as a processor.
Analogue heritage
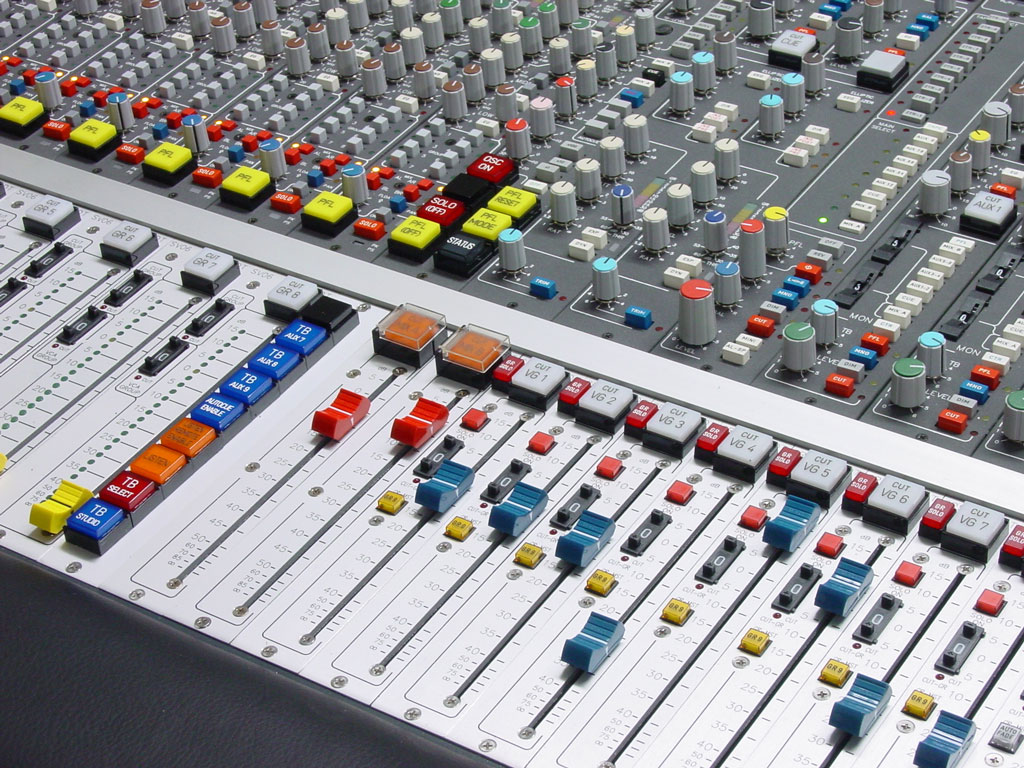
VCAs were created to meet live and studio mixing needs: quickly controlling instrument families (drums, backing vocals, brass) without losing the fine-tuning you’ve done on each channel. With digital consoles, the pure software equivalent is often called a DCA (Digitally Controlled Amplifier): the principle (global control) is identical, but the implementation no longer involves analogue amplification. In DAWs, you’ll see VCA faders or VCA masters, which bring the same logic into a software mix while preserving your existing routing and effects choices.
The role of a VCA in audio mixing
Controlling several tracks without grouping them
The strength of an audio VCA lies in its ability to control a set of tracks without sending them to an extra bus. You keep the architecture of your session (routing, inserts, sends) while adding a single central handle for the whole set. Need to pull the drums down by 2 dB in a verse? One move on the dedicated VCA fader is enough, without touching the individual faders or the drum group bus. This approach reduces the risk of upsetting a carefully crafted balance and speeds up revisions.
Preserving automation
In modern mixing, automation is an integral part of the final result. A VCA fader lets you apply a relative adjustment to a group of already‑automated tracks: you keep every tiny move (snare ghost notes, cymbal accents, vocal breaths), and multiply the whole lot by a global factor that you can see on a single curve. In a DAW, automation written on the VCA is usually combined in trim with the automation on the target channels: you adapt the macro‑dynamics without rewriting all the curves track by track and without creating inconsistent levels on your post‑fader effects.
Difference between a VCA and an audio group
An audio group (or subgroup/bus) sums several tracks to a common bus where you apply audio processing and level control. A VCA, by contrast, does not route audio: it controls the level of the tracks at source, as if you were moving their faders in parallel.
- Audio group: summing to a bus. Any processing you place on that bus affects the whole lot (drum bus compressor, overall EQ, shared saturation, etc.). Pulling the bus down does not change the post‑fader sends made from the original tracks to effects that sit outside that bus: the reverb therefore doesn’t follow the bus reduction and becomes relatively more prominent in the mix if its return goes straight to the master.
- VCA: no summing. The VCA alters the effective position of the channel faders (or their software equivalent). Result: post‑fader sends naturally follow the rise/fall, which keeps the ratio between source and time‑based effects intact. Pre‑fader sends remain unchanged. A VCA is therefore ideal for quick musical tweaks that preserve the overall perception.
Practical consequence: if you want to change the level of a group while keeping the effects balance (post‑fader) intact, a VCA is often the most straightforward tool. If you’re after a shared colour (bus compression, overall EQ) or stem‑based management for export, then an audio group is the right option. The two approaches are complementary, and many mixes combine VCAs and buses to enjoy both the flexibility of control and the sonic cohesion of shared processing.
Quick examples in DAWs
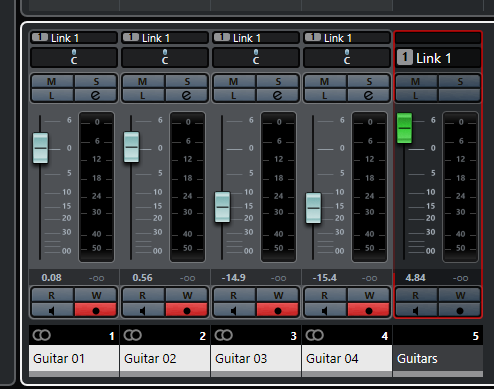
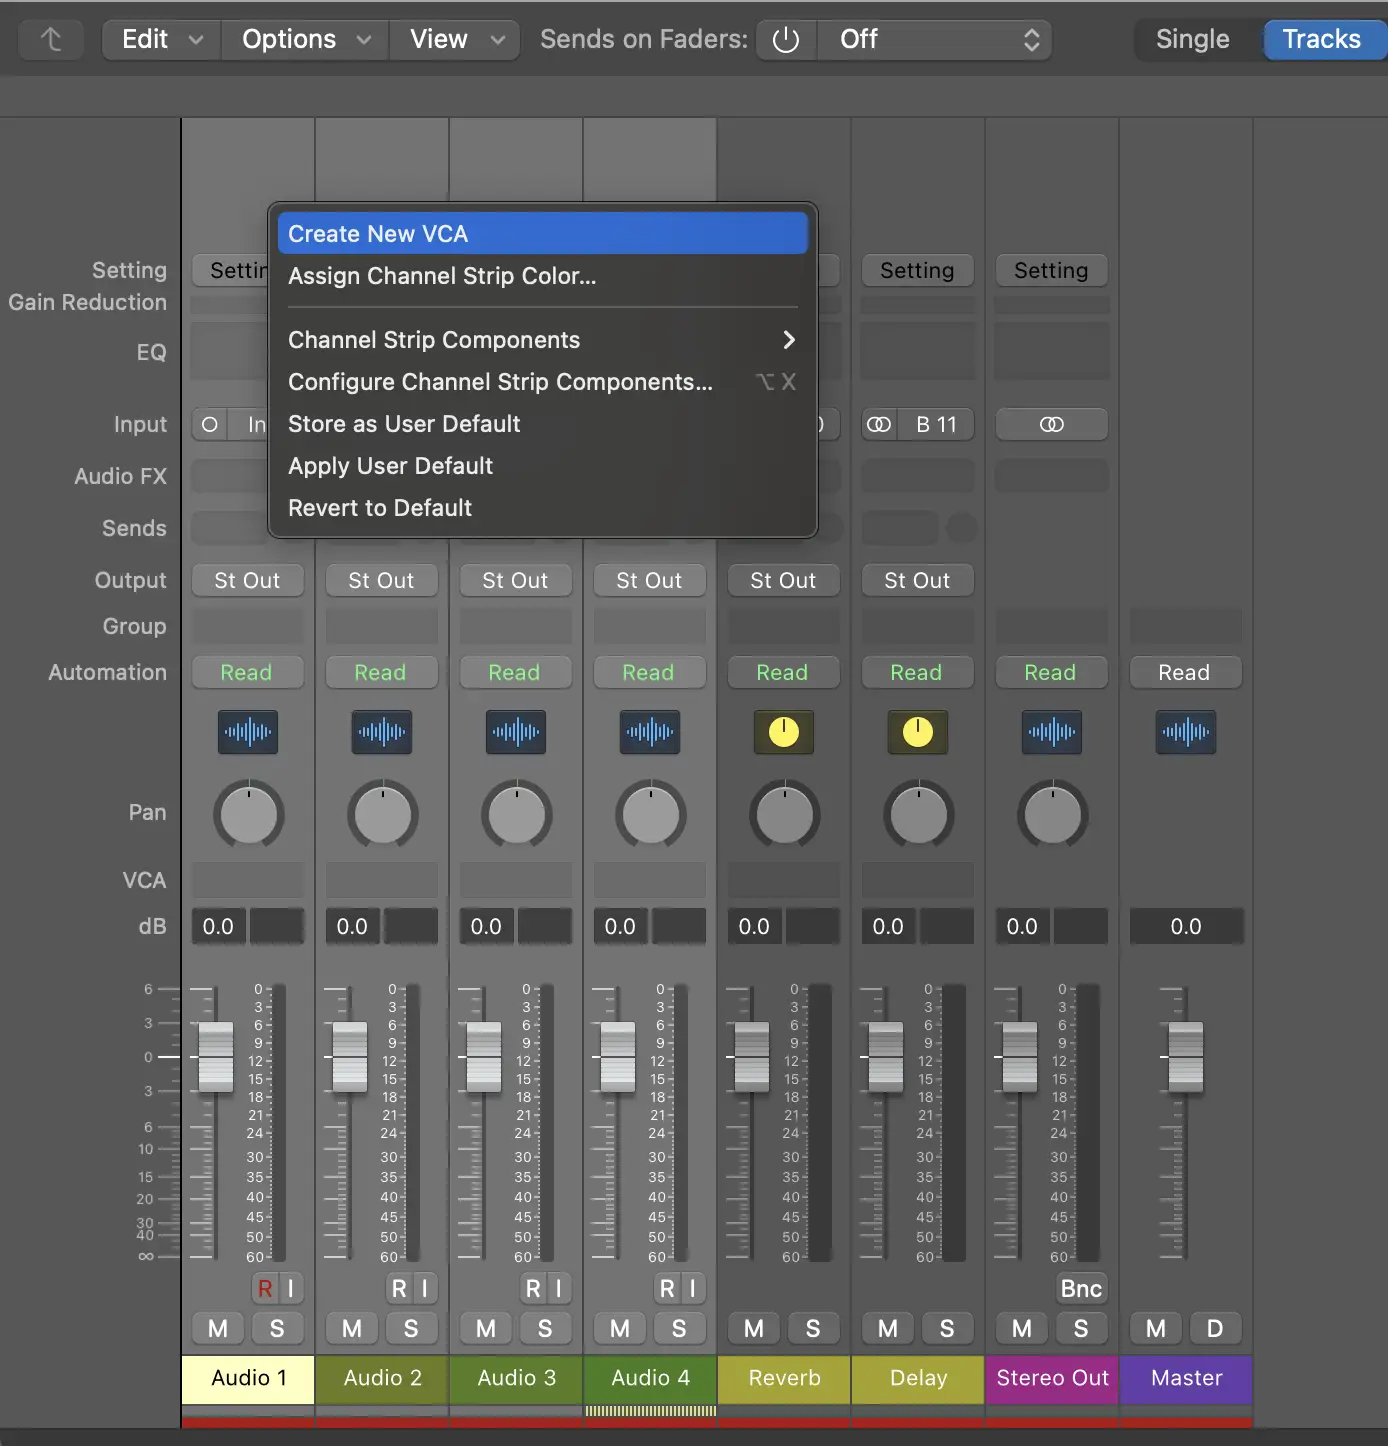
Cubase/Nuendo VCA: create a VCA Fader, then link it to the target tracks via the channel‑link or VCA assignment function. The VCA fader controls the level of the linked tracks without creating any additional audio bus. This integrates nicely with existing groups and doesn’t disrupt your sends to effects.
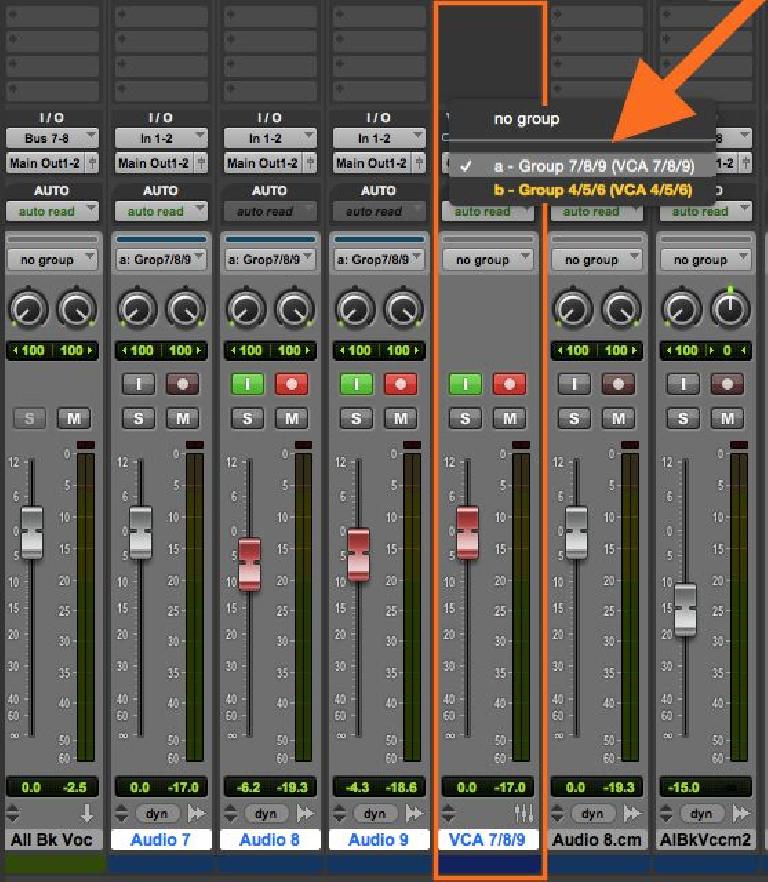
Pro Tools VCA: create a VCA Master and associate it with a mix group. The VCA Master then drives the faders of the member channels while preserving their automation. Post‑fader sends follow along, pre‑fader sends remain unchanged. You therefore adjust an entire family while still retaining individual access to each track for any micro‑tweaks.
Logic Pro: depending on the version, you can create a VCA and assign channels to the same controller via the Inspector. The logic is still that of a global level control, separate from a Summing Stack (group/bus). A VCA simplifies the management of dense automation by allowing late global corrections without breaking your detailed moves.
Concrete example of use
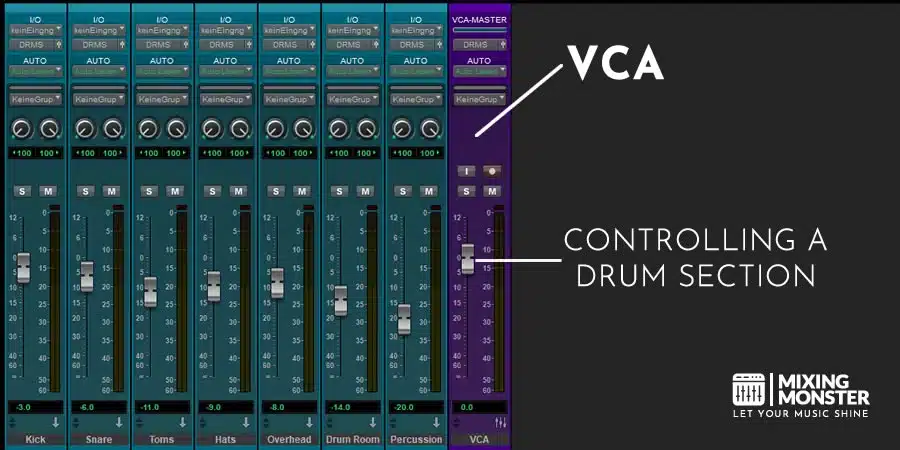
4 drum tracks controlled by a VCA
Imagine four tracks: Kick, Snare, Overheads, Room. You’ve already balanced the levels, applied your per‑track processing, and sent a bit of snare and room to a post‑fader reverb. The aim is to keep the flexibility of a single control without losing the individual nuances you’ve dialled in, especially on the snare attacks and room ambience.
- Create the VCA: add a VCA fader (or a VCA Master) and assign Kick, Snare, OH and Room to it. Name it DRUM VCA so you can spot it quickly, and avoid accidentally including effect returns.
- Check the sends: since the reverb sends are post‑fader, turning the VCA down will also turn down the amount being sent, thus preserving the source/FX ratio during quieter verses. Conversely, if some sends are pre‑fader, they won’t move; make a note of this so you can anticipate the overall balance.
- Global automation: write a −2 dB automation move on the VCA during the verse, then bring it back up to 0 dB in the chorus. The individual mic automations remain untouched. You’re shaping the macro‑dynamics of the kit without flattening the detail that makes the groove feel alive.
- Combining with a bus: if you also want to glue the drums together with some gentle shared compression, create a drum group bus and route the four tracks to it. Place a light compressor on that bus. Keep controlling the overall drum level with the VCA. You now get both the bus colour and the flexibility of the VCA, without altering your post‑fader effect sends, which will follow the VCA control.
Tip: if you’re also using a dedicated “drum reverb bus”, try two approaches: keep the reverb post‑fader on the tracks (it will follow the VCA), or route the reverb after a shared bus. Choose whichever best maintains your sense of depth between verse and chorus, and avoid double‑counting if you’re doing parallel compression.

VCAs today: analogue, digital and software
VCAs on a digital console
On a digital console, the equivalent function is often called a DCA. The principle is the same: you create a global controller that drives the level of multiple channels without changing their audio routing. The benefit is especially clear in live sound: you create DCAs for your families (drums, bass, guitars, keys, lead vocal, backing vocals) so you can manage the show’s dynamics with just a few faders, while keeping your gain, EQ and dynamics settings per channel. Muting a DCA instantly mutes all the relevant channels, and layer “spill” functions (depending on the console) let you quickly display the channels under its control for targeted tweaks.
Modern DAWs
In today’s DAWs, VCA faders are designed to speed up workflow and keep automation stable. Here are a few usage points to bear in mind:
- Clear structure: use VCAs to control families, and groups/buses to process families. The first organises your moves, the second shapes the sound. Separating the two keeps your sessions readable and makes export easier.
- Trim automation: write the detailed musical moves on the tracks, then “frame” them using a VCA. DAWs generally combine these curves without losses, which avoids destroying the micro‑dynamics.
- Readability: give your VCAs clear names (e.g. DRUM VCA, BGV VCA, FX‑Returns VCA) and distinct colours so you can spot them instantly in busy projects.
- Stem export: a VCA is not a bus. If you need to export stems, base them on your groups/buses (stems like “DRUM BUS”, “MUSIC BUS”, etc.). The VCA remains a control, not a summing point for export.
FAQ
What does VCA stand for?
VCA stands for Voltage Controlled Amplifier. Originally, it’s an analogue component whose gain is driven by a control voltage. In mixing, a VCA fader is a global controller that changes the level of several tracks without creating an extra audio bus: it acts as if you were moving their individual faders together, which preserves the behaviour of your post‑fader sends and the way your session is organised.
What’s the difference between a VCA and a DCA?
The principle is the same (global level control), but the context differs. VCA refers to the analogue implementation (Voltage Controlled Amplifier), while DCA (Digitally Controlled Amplifier) describes the software/digital version, common on digital consoles. In both cases, you control the level of several channels without changing their routing to a bus, which makes automation and quick musical adjustments easier.
Is a VCA useful in a home studio?
Yes, even in a home studio. A VCA fader makes it easier to mix families (drums, backing vocals, guitars) and saves you from having to reach for ten faders at once. It also lets you scale automation you’ve already written, make temporary global level drops (for instance in a verse), and improve your session’s readability. Combine it with groups/buses for colour (bus compression, shared EQ) and with solid naming/colour discipline to keep your projects clear and efficient.

")
